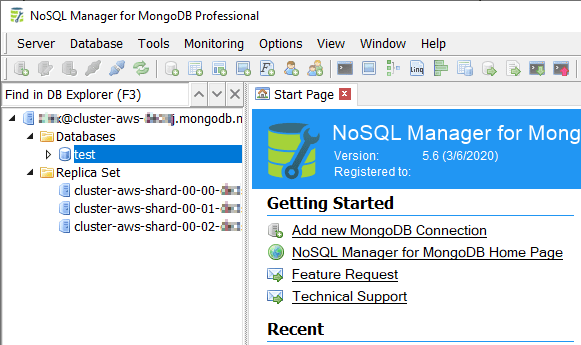
How to configure MongoDB Atlas Cluster connection
MongoDB Atlas is a cloud-hosted MongoDB databases service built and run by the team behind MongoDB.
Here's a step by step guide on how to establish connection to MongoDB Atlas cluster in NoSQL Manager for MongoDB.
1. Configuring MongoDB Atlas
By default, MongoDB Atlas cluster in not available for direct connections outside the cloud.
However, you can configure which IP addresses can access your cluster using cloud web-interface.
Login to MongoDB Atlas usign your account and click Network Access on the left panel.
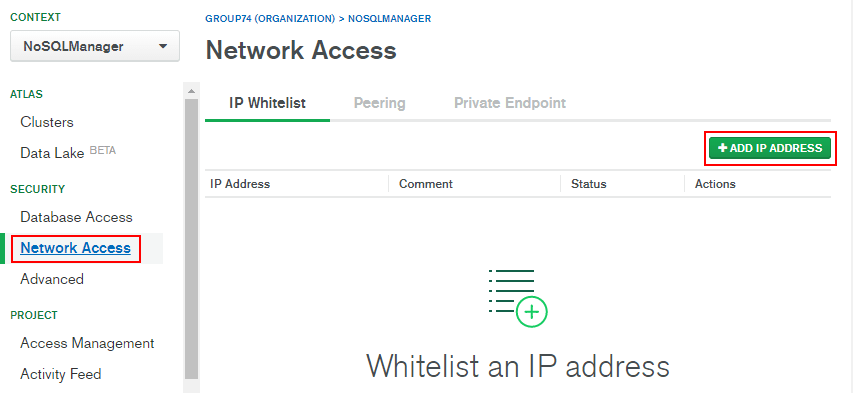
Next click Add IP address button.
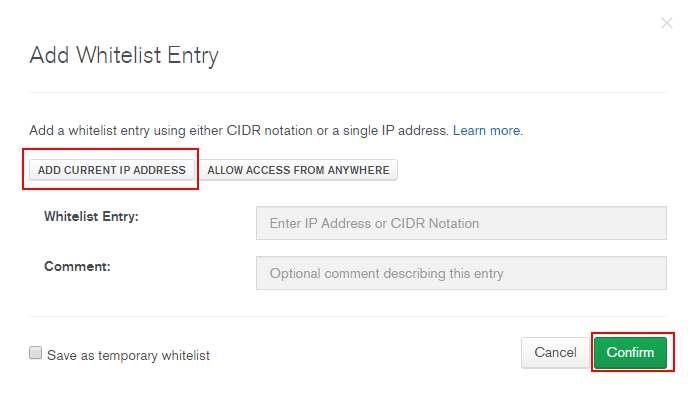
In the next window click Add current IP address and click Confirm.
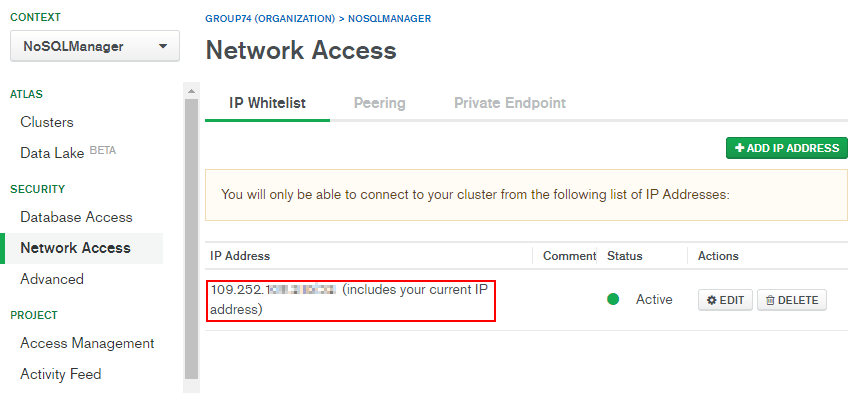
Now you can connect to your cluster from your local computer.
2. Discover the cluster connection parameters
Next, you need to find out your MongoDB cluster connection parameters and use it in NoSQL Manager for MongoDB.
Click Clusters on the left panel.
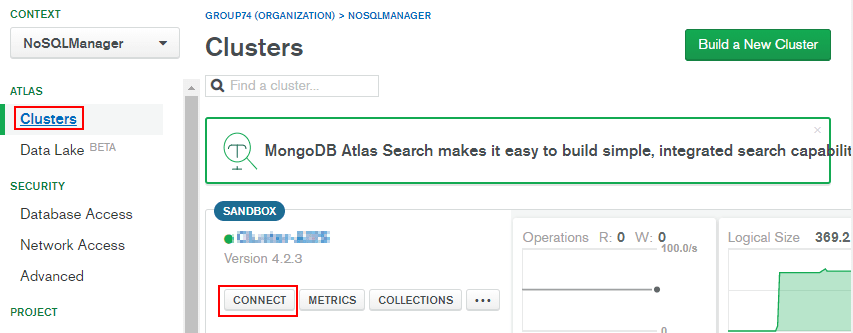
Find your cluster and click Connect.
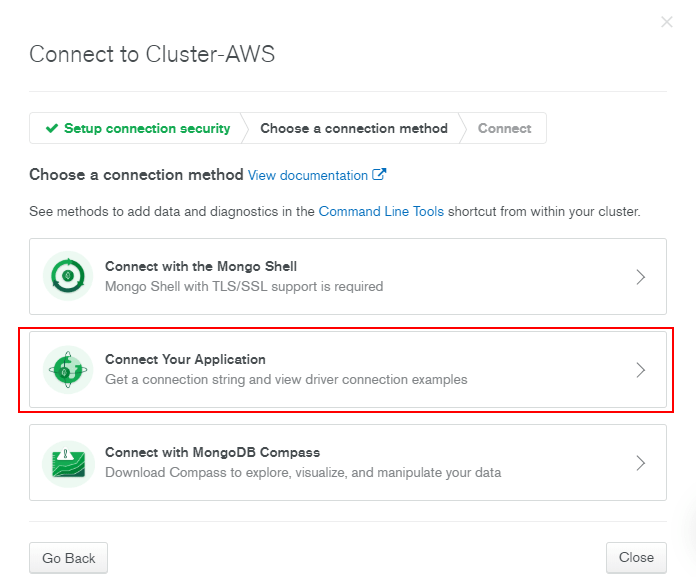
Click Connect Your Application on the next dialog.
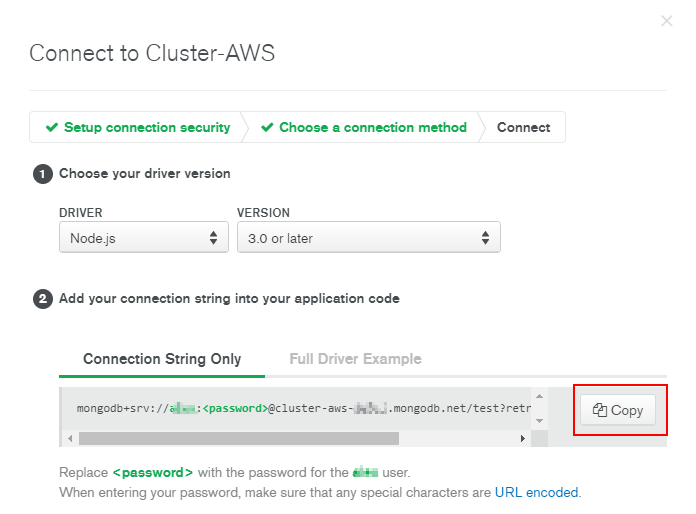
Copy the connection string to Clipboard using Copy button.
3. Create connection in NoSQL Manager for MongoDB
Finally, you should create a connection for your cluster in NoSQL Manager for MongoDB.
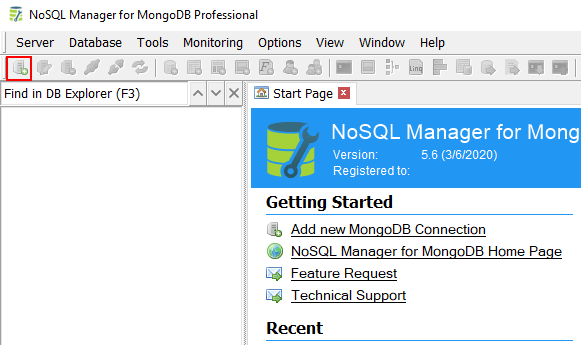
Open NoSQL Manager for MongoDB and click New MongoDB Connection... button on toolbar.
Click Import connection string on the New MongoDB Connection dialog.
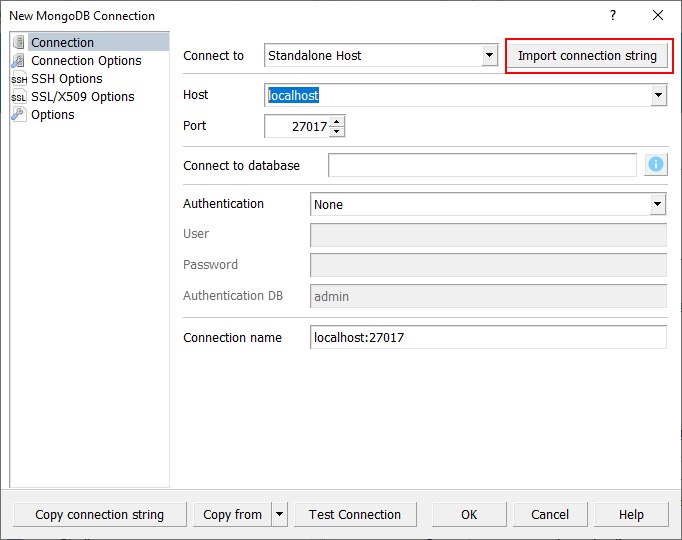
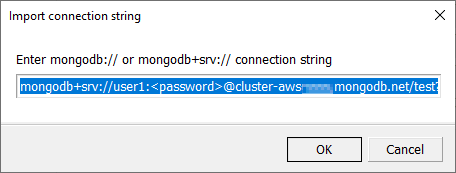
Your connection string should be inserted automatically into the Import Connection string dialog. If not, please paste or type it manually. Don't forget to replace <password> with the correct user passoword. Click OK.
Now your MongoDB Atlas cluster connection is ready.
You can test it with Test Connection button.
Click OK to save the connection.
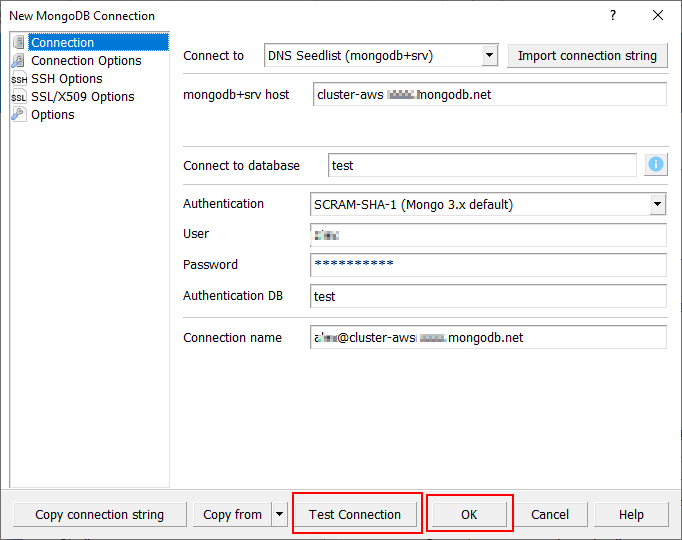
NoSQL Manager for MongoDB is ready to work with your cluster.
